Showing posts with label felt. Show all posts

Monday, March 8, 2010

St. Patty's Day { Patch Pin }

Hey all! I am now contributing to Executive Homemaker! If you're NOT familiar with EH, it's a great location to find free printable goodies. There's also some excellent ideas, like how to throw a successful St. Patty's Day bash.

I have a tutorial up today on how to make this patch pin for St. Patty's Day. Use it for a headband, bag charm, or simply pin it onto your shirt to avoid the pinch.

Go here to get the full how-to and free pattern!

Thursday, March 4, 2010

Tooth Fairy Pouch

My niece, Kaily, lost her first tooth today. My dad pulled it out. It was quite exciting. It's been loose for weeks now, and she finally let Grandpa string it up and jerk it out.

Since the tooth fairy is visiting her pillow tonight, I wanted to maker her something special to house her first tooth.


1. Cut a piece of wool felt to approximately 2" x 5" and a tooth shape out of white wool felt for the front. I freehanded mine, but you can trace the outline of a shape like this. You can search google images for one you like.

2. Sew the tooth to the 2" x 5" strip. Stick close to the edge of the tooth as you stitch it on.

3. I put a "K" on the tooth with pink embroiddery floss using a basic back stitch.

4. Fold the 2" x 5" strip in half, right sides together. Sew down the sides and turn right-side out.


Very easy. Sorry I didn't take step-by-step pictures of this one. It was a spur-of-the-moment job. If you want to make this and have questions, please don't hesitate to email me. I'd be happy to help you! I hope you guys aren't getting sick of wool felt. I can't help it, I have a craft crush on the stuff.

Wednesday, January 27, 2010

Owl Softie Ribbon Teether


My baby girl is teething right now. Although you can never have too many receiving blankets, I really didn't want to go to all the work of making a teething blanket. So, I formulated this cute little owl softie. My daughter loves it. It's small enough for her little hands to grab onto, soft enough to cuddle with, and a total cinch. And how cute would this be for a baby shower gift?

1. Cut out your pieces. Owl body, owl wings, facial pieces, and ribbons. I just freehanded the body and the wings. But if you guys want me to post this as a pdf pattern, just let me know.

2. Fold the inside curve of the wings under about 1/4" and iron flat. You know how I feel about starch when it comes to making these creases. USE IT!

3. Sew the wings to the body. Get creative with your top thread color. I thing it adds a little whimsy when the stitches don't fade into the background.

See how close I stuck to the edge?

4. Place the facial features onto the face and sew on. I used wool felt for the eyes and the beak... it's a true obsession, me and wool felt.

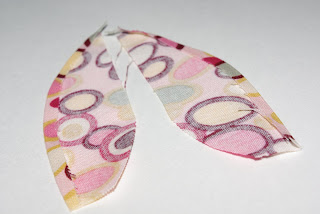
5. Next fold a strip of ribbon in half. I prefer grosgrain ribbon so the texture can massage baby's gums when she's munching away on them. Pin the ribbon to the body with the rough edges at the edge and the folded end pointing inward. Arrange the ribbons around the wings like feathers, and two at the base like feet. Sew them on.

6. Now put the back to your owl against the front, right sides together, and sew it up. Be sure to leave a little opening to turn it right side out.

7. Go ahead and stuff it up with some batting.

Don't overstuff this little cutie. It's meant to be kind of flat so little fingers can hold onto it easily. Whip stitch that opening shut.

8. And there ya go! A nice little owl softie ribbon teether.

*** Due to multiple requests, you can now download the pieces to this owl for free by going here.

Thursday, January 21, 2010

Cape Apron Tutorial


My son tends to believe he's a super hero. He even wears ski goggles around town and keeps them on when we go into the store.

For Thanksgiving, I made him a super hero cape. Not only does he love it, but his cousins play with it lots, too.

Since cousin Kaily had a birthday this week, I made her this Apron Cape. It does double duty, acting as an apron by day and a cape by night. And... you've guessed it... it's easy.

To download the neck template go here.


1. Fold your fabric in half, the hot dog way. Put the neck template at the top and pin in place. Cut around the template. I like this style of neck because I'm paranoid and don't have to worry about ropes, strangulation, and all those cheery things us moms stress about.

2. Lay your ruler at the same angle of the template. And cut down the side.

Unfold the fabric and you should have your cape. You need two of these pieces.
One for the front, one for the back.

3. For the bottom corners, just lay a plate or something round onto the fabric and trace the curve. Cut along the curve so the corners are rounded.


4. I love typeface design... guilty by trade, I suppose. So, I put Kaily's first initial on the cape. I found a font I liked, printed it out to the size I wanted, and cut it out. I then pinned the paper letter to some wool felt and cut it out.


Once I was pleased with the design, I sewed it to the right side of the cape. LOVE wool felt. No need to fold under the edges or anything. Just sew around the edge and that's all you have to do.


5. Now put the front and the back pieces of your cape right sides together and sew them together.

Be sure to leave a small opening so you can pull them right side out.
Pull the cape right side out and whip stitch the opening shut.

6. Iron the cape flat, taking extra care along the curvy parts of the neck.

7. Sew the pieces of velcro to the neck, stitching with a simple "X" shape. You could even do button holes if you'd like. I just thought velcro would be easier for the kiddos.

8. Ta-da! Done! Super easy, super cute, super fun, and very versatile in purpose.


My friend, Claire, made these for her two very cute boys.

Saturday, January 9, 2010

Easy Peezy Lemon Squeezy Wallet


Okay. So, I've got another super easy project for all of ya. This doesn't take a whole lot of time and you'll feel like a fashionista (slash) domestic goddess. Not only will your cash be stored in style, you can now claim your stake to crafty fame by telling everyone you made it yourself. I love being able to tell people that.

I call this the Easy Peezy Folded Wallet and this can be made in about thirty minutes. I'm sure you'll want to keep this once it's finished, but it would certainly make a great gift, too!
***To print out the pattern pieces, right click the image, save to your desktop and print onto an 8.5"x11" piece of paper.

Cut the exterior from a cotton-twill kind of fabric.

Cut the interior out of wool felt.

Cut the credit card pocket out of cotton-twill and the cash pocket out of felt.
Be sure to cut the pockets on the fold as indicated on the pattern.

Take your exterior piece of fabric and fold each side inward. Iron flat.

Fold the credit card pocket piece in half and fold the sides with rough edges inward. Iron flat.

Take the pattern for the credit card pockets and mark where the dotted white line indicates.

I like to use THIS TOOL to mark lines. You can use it like a rotary cutter against a ruler and it makes your lines perfectly straight. Plus, unlike a marking pencil, it doesn't wrinkle your fabric as it draws.

Fold the felt cash pocket in half and iron flat. Stack the fabric credit card pocket on top of the cash pocket. Sew along the lines you marked in the previous step, attaching the credit card pocket to the cash pocket. Next, lay the pockets on top of the felt interior piece.

You should have four layers. The credit card pocket, the cash pocket, the felt interior, and the fabric exterior. Stack the layers in that exact order, being sure the lines match up perfectly around the edge. All of the fabric pieces should have their rough edges folded inward. All of the felt edges are left rough. That's the beautiful thing about wool felt!

Sew around the very edge of the rectangle, adhering each layer to each other.

Fold the flap over the credit card pocket and iron in place. Starch is pretty handy in this step to make the crease nice and crisp.

Now you have a nice little home for your moolaw.

Plus, it just makes me happy looking at it, knowing it only took thirty minutes. Beautiful.

Thursday, January 7, 2010

Felted Monster


I have a cutie named Jack. He's turning three this year. There really isn't all that much for little misters in the tutorial world. LOTS for girls, but finding fun things to make for boys is kind of tricky.

Felt toys are pretty popular right now, especially ones that have that homespun flare. Imperfections are part of their charm.


So, introducing this cute/ugly/scary/hilarious felted monster doll. I have the full detailed pattern and instructions available on etsy for a mere $5.00. You can find it HERE. If they sell out, you can email me at emhward@hotmail.com and I'll list some more.


Otherwise, follow this quick tutorial and figure it out as we go. No sewing divas necessary. This is super simple and like I previously said, imperfections are part of its charm.


1. Pin the pattern pieces to your fabric and cut out.


2. Construct your arms and legs.


3. Sew on facial features.


4. Pin arms and legs to front side of face, pointing inward, and sew in place.


5. Sew the bottom strip to the face, being sure the legs and arms are pointing inward.


6. Sew hair onto the back.


7. Attach back to the face and bottom. Sew it up.


8. Turn monster right-side out and stuff.


9. Pinch opening shut and seal it up with a whip stitch.


YAY! All done. Get creative with your facial features, hair, and any other
embellishments you'd like to add. Although I used wool felt, you can use whatever.